No more excuses! In the below words, you’ll learn how to install wireless security cameras without having to pay money for installers.
Nowadays, The most important feature of wireless security cameras is that they don’t need a specialist to install them.
In recent years, having a wired surveillance system and installing CCTV cameras and video recorders is considered one of the hardest steps in securing your home or property.
But now it’s different. Installing wireless cameras is more straightforward than installing wired cameras. You might need to drill a small hole to run a power cable through it, but they still don’t need nearly the effort and the time required to install a wired camera.
You just need to find the right location for wireless security cameras and then mount it in place, after that find a way to power the wireless security camera, and you are almost done.
This guide will give you an insight into the basic setup and installation steps you will have to follow to complete your job and install wireless security cameras in a few minutes.
What are the tools required for Installing Wireless Cameras?
Before we dive into the steps needed to install wireless security cameras, we need to collect the required tools we will need through this setup. The majority of work needed for this setup is the drilling and mounting of the security camera, no run for wires or cables except you have a plugin wireless camera.
Below are the things you will need to install a wireless camera properly:
- Simple draw of Home
- Screw Driver
- Electric Drill
- Drill bits
- Signal Extender or AP
Steps of How to Install Wireless Security Cameras
In a brief, to install wireless security cameras or any surveillance camera whatever analog CCTV, PoE, or Wireless IP camera, you have to first find the best location to make the camera cover most of your property, drill holes to fix the mounting bracket of the cam, use the screwdriver to fix it, and the last thing is to link the camera with the network through the NVR and the mobile app.
Besides it’s easy to install, wireless security cameras are excellent options for your home and properties surveillance system, as they provide you complete protection and instant access to your home, business, regardless of where in the world you are.
Now, Let’s see the steps in details
Step1: Get the Best Location For the Camera
It is essential to find the right location for your wireless surveillance camera. It boosts the performance of your camera and makes sure you get maximum security and protection.
First, find out the angle coverage that the camera can provide. Back door, front door, and off-street window are the best places and locations recommended by security specialists.
Second, setting up wireless cameras high on walls is an excellent idea to protect them from burglars. However, higher angles often offer a wider range for monitoring, so you need to set your monitoring device at the highest possible point to cover the wanted area.
There are other things to keep in mind when choosing the best place to mount the camera:
- Avoid directing your camera directly to a light source. It may result in a slight underexposure of images and videos captured.
- Set the needed mounting bracket for the camera under the eave. It assists in protecting outdoor security cameras from changing and severe weather. In case you’re using it inside home, put it on a bookshelf away from childrens, and pets.
- Place cameras close to a power source if you have a wireless camera that is powered by an adapter. Even if you have a wire-free security camera that doesn’t need a power supply.
- Install Wireless security cameras near to your Wi-Fi router or pick a wifi signal extender to avoid loss in network signal.
- Don’t install your security cameras near your neighbors’ bathrooms, properties, or areas where people should enjoy their privacy.
Note: If you don’t need remote viewing or other online features, you can install wireless security camera with wifi and use it offline.
Step2: Drill Holes and Fix Cameras
After choosing a placement to install wireless security cameras the next step is to use the drill.
First, Direct the mounting bracket toward the targeted area and mark the screw hole spaces using a pencil.
Making pre-drilling small holes into the cam place (with a screw that is smaller than the bracket’s screws) is a good idea as it helps the screw penetrate the material of the soffit or wall easily and smoothly without any additional damage.
Second, Put the mounting bracket toward the wall and insert the screw into place – be sure the bracket is totally secured before setting up the camera.
Third, attach the camera to the bracket and put in the needed batteries.
Pro Tip: If you are interested Learn more about How to charge wireless security camera batteries with different easy methods.
At the moment, you have finished the hardest step of the installation process and the camera should be ready to go.
Note: A number of the most common issues that may damage the camera are usually because of improper fixing of camera screws. Problems include wall damage, crack in the camera body, and cam directed with a wrong viewing angle. So, to avoid these problems make sure you install everything carefully.
Step3: Download Camera Mobile App
The majority of camera producers provide apps to be installed on your cell phone to monitor the cameras when you are outside.
Now time to install and set up the mobile app (if the cameras can stream to a mobile device).
Once you’re assured that your wireless security cameras can be connected to your phone, stick to four essential actions to enjoy remote monitoring on the go.
Whether you own a Samsung Galaxy, a Samsung Galaxy, a Hawaii y9, a Google Pixel, Apple iPhone, or other kinds of cell phones, here’s what you have to do to connect our security cameras to your mobile phone:
- Go play store (Android Users), or Apple store (IPhone users) and search for your cam mobile app.
- Download and Install the security camera app on your phone.
- Start the security application and add your camera(s)
- Click on (+) icon on the menu to add your camera, then scan the camera code that exists on the cam.
- Once your finish adding your camera to the application, then fo for the linked security camera(s) lost on your cell phone and enjoy live viewing
- Apply custom surveillance configuration settings like alerts frequency, upload path, motion detection mode, and others to fulfill your specific monitoring requirements.
Now that you have finished these easy steps, you can see the live view of your security camera(s) in your business or home.
You can also enjoy speaking with the person on the other end of the screen through the security camera linked to your cell phone (if the camera comes with 2-ways audio facilities), saving and playback the video recordings if your wireless camera supports using micro SD cards to store videos.
Step4: Link the camera with Base Station or NVR
The last step in how to install wireless security cameras guide is to connect the camera with NVR, or Base Station.
This step is important if you have a wireless security system with different cameras that you want to watch on the display screen, also to store your recorded videos for a long time on NVR hard disk.
First, The initial thing to do is set up the Network Video Recorder (NVR), but you will first need to power the NVR with the supplied power adapter.
Second, Link your display by using a VGA cable with the VGA available ports of the NVR and the screen.
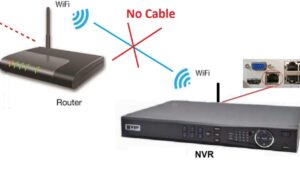
Third, Connect your wireless security cameras to the LAN ports of the NVR (if you have a video recorder with an antenna) by using the provided LAN cables. After that, connect the Network video recorder to the router through the LAN port by using an Ethernet cable.
Note: in case you don’t have an NVR with an antenna you can pick a network router or wireless access point that provides a wi-fi signal and link the cameras to the router after that connect the router to the NVR.
In case your cameras suffer from weak Wi-Fi signals, you can learn how to Increase Wireless Security Camera signals in different ways.
Summary
Many customers are going for wireless security cameras to fulfill their security requirements as they are flexible, movable.
Finding how to install wireless security cameras is easy, and you don’t need any special skills or experts to do it. In the above words, we’ve listed the steps necessary to install a wireless surveillance system properly.
Resources: Electronic House, Lorex