Connecting an NVR to a wifi router can be a tough thing, especially for new surveillance camera owners who don’t love to have a lot of wires on their house walls, or system wiring issues.
There are several ways to connect NVR to wifi router without cable that don’t involve any additional wiring. You can use a wireless bridge, a travel router, or even a USB WiFi adapter to connect the NVR to your wifi router.
E.g Netgear for communication devices produces an adapter that allows your wired DVR/NVR to communicate wirelessly with your router.
So, If you have bought a new NVR, then you may want to consider purchasing a WiFi bridge.
This bridge will provide the connection between the two devices DVR to wifi router, or NVR to wifi router without using any extra ethernet wires.
All of these options are easy to set up and use allowing you to get the best connection possible for your CCTV system.
In this blog post, we’ll dive into how to connect NVR to wifi router without cable in easy and different methods. Keep reading
Can I connect NVR to the router?
In general YES, you can connect your NVR to the router in 2 different ways. First, you can connect the NVR to the home router directly via an Ethernet cable, or through a switch. The second way is to connect NVR to the router wirelessly without a cable by using a wifi signal.
Both ways are good for connecting the security system NVR. They only differ on the wires and are you want to use wires and cables or not.
Why It’s important to Connect NVR to wifi router without an Ethernet Cable?
Connecting an NVR to a wifi router via a wired connection is considered the hardest step in installing a security system.
Even with the right cables, you may fall into issues like the possibility of passing cables through narrow places, poor connections, long cable lengths, cuts of system wiring, and more.
However, you can fix these issues and get the optimal performance from your system, or you can save your time and effort and connect NVR to wifi router wirelessly without a cable.
Now,
How do you Connect NVR to WiFi Router without Cable? Or NVR to WiFi Router Wirelessly?
To make it easy for beginners we’re gonna use a Wi-Fi adapter for PoE NVRs, and if your network video recorder has already a built-in antenna then you can link it to the router directly through a wifi signal. Here are the steps:
Step 1: Power the NVR and link IP cameras

Before doing anything to connect NVR to wifi router without cable, you must power up the NVR and ensure that the IP wireless cameras are linked to it.
To start, take the power adapter of the NVR unit and connect it to the nearest power source available, then mount the IP cameras in the right locations, power them up, and lastly link your IP cameras to the NVR.
After making sure all connections are secure and properly fitted, take an HDMI cable from the NVR unit directly to the display screen.
Once they are powered on and connected to the screen, you can then access the NVR live view, and check whether the cameras are connected successfully or not.
Depending on your NVR user interface, most NVRs have a connection status indicator on the bottom of each camera view to show if the camera is connected or if there’s a connection problem.
Finally, Turn on your home wifi router, and make sure that the NVR exists in the wifi range.
Step 2: Install a WiFi Adapter

Unfortunately, not all NVRs have a built-in antenna, some old versions of NVRs and PoE NVRs are designed to be linked to a network wifi router via an ethernet cable.
So these NVRs need a WiFi receiver device to make the video recorder device connected through a WiFi signal.
Also, If your network video recorder is mounted in a faraway location or doesn’t have a powerful antenna then you can also use a WiFi adapter or wireless bridge device.
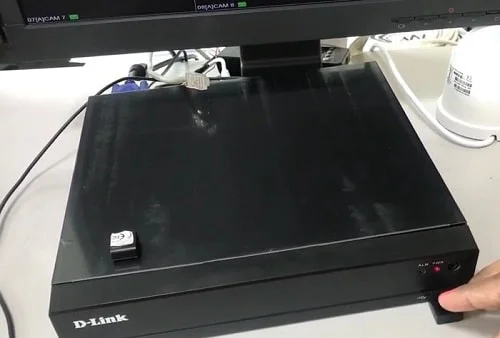
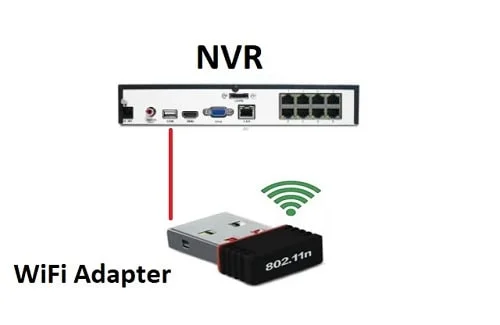
Depending on your needs and the model of your video recorder, get a WiFi adapter from any online store, then plug in the USB WiFi Adapter into one of the NVR’s USB ports.
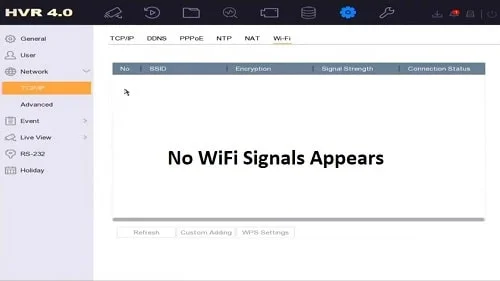
Wait a few minutes, after that log in to the NVR main page, then to the network section to see the available WiFi signals.
Step 3: Activate the Wi-Fi option
It does not stop on installing the WiFi adapter, to connect your NVR to wifi router without cable (wirelessly) you need to check your NVR firmware version and update it if it’s outdated.

To do this, first, check the NVR connection status and see if the wifi option exists or not. If not then you probably need to update the NVR firmware.
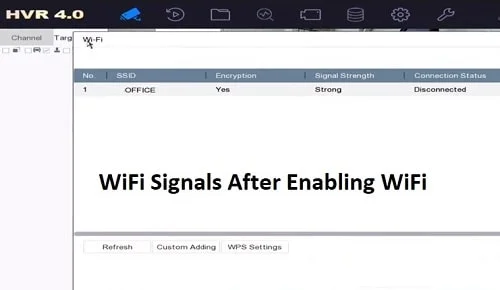
Once you update the NVR firmware, the wifi connection is enabled, and you just need to activate it.
Activating the Wi-Fi option is an easy way to connect your system network video recorder (NVR) to your home router without the need for additional cables or wires.
Anyway, to activate the Wi-Fi option, here are the steps:
First, on the camera live view screen, press on “right-click”, and choose “Main Menu”
Second, navigate to the “Network” icon. Then, select from the right column on the screen the “WiFi” option.
Third, on the Wifi setting page, you’ll find that the wifi is disabled, mark on the box to “ENABLE” it.

After this is done, scan the QR code in the device label with a compatible app and start to configure the network and other settings from your mobile.
Step 4: Enable Router DHCP
There’s another important thing that many beginners forget to activate which is the DHCP. But what it’s?
All right, DHCP (Dynamic Host Configuration Protocol) is an IP addressing method used to assign IP addresses to different devices in a system automatically to avoid IP conflicting issues.
So, when you enable it, The DHCP will automatically give each device such as IP cameras connected to the NVR an IP address without any manual configuration required.
Doing this will eliminate many connection issues, as well as it will make the access and control of each device in the security system easier.
To enable DHCP on your NVR, simply open the “Network” section again, and you’ll find it below the “WiFi” option.
Once enabled, all connected devices should be able to obtain an IP address from the same pool of available addresses.
Keep in mind that if you enable DHCP on the NVR consider disabling it on a wifi router, or visa versa, it’s not allowed to enable/disable the DHCP option on the same network.
Step 5: Check the connection status
The next step is to link the NVR to the home wifi router but before you start this step, you should have the WiFi or SSID password.
Once you get this information, then make sure that the router and camera are turned on, open the NVR setting page, and go to the network section.
In this section, click on the “Search” button below to see the available wifi networks in the NVR range, choose yours and click on it.
Next, The NVR will require you to enter the SSID password, write your WiFi password and click on the “Apply” button.
Take a few seconds, then click on the “Search” button to see the WiFi network and check its connection status.
In most cases, the connection status will be “Connected” if not, then you have to check the power cables and check if they are correctly connected or not. Also, check the WiFi LED indicator on the router.
You may need to reboot your modem if there is no internet connection or reset the network settings of your device and reconnect it with new credentials.
Step 6: Turn on the P2P connection for remote viewing
The last step on how to connect NVR to wifi router without cable process is to enable the P2P connection for remote viewing.
P2P, or Peer-to-Peer connection, is used for connecting devices with each other over the internet, or private LAN.
For surveillance cameras and security systems, The P2P connection establishes a direct connection between a video recorder and a remote server over the Internet, which allows users to access it remotely from anywhere with an internet connection.
Anyhow, To turn on P2P on your NVR for remote viewing, follow these steps:
1. Access your NVR’s configuration settings and select “Network”.
2. Under “Network” select “P2P Settings” or something similar depending on the model of NVR you are using.
3. The P2P in most cases is offline, click on it to enable a P2P connection.
4. Select ‘Save’ or a similar option to save all changes made in this step before moving on to the next step in the setup process.
5. Once saved, refresh the page to see if the connection status on P2P is turned on online or not.
6. After being online, your NVR should now be visible through a remote server over the internet using a unique QR code provided on the same page by your NVR provider/manufacturer.
Finally, download the required app by scanning the QR code and testing the P2P connection with your mobile.
Note that while testing this feature, you should use a different internet WiFi connection.
For more details on how to connect NVR to WiFi router without cable, watch the next video:
Source: D-Link India
Does NVR support WiFi?
Yes, NVRs are available with built-in antenna support using WiFi. These types of NVRs are convenient as they allow you to access your cameras and view the footage over your local network or remotely over the internet without having to run any extra cables.
However, there are some PoE NVRs that don’t support using WiFi and they are connected to the router or the PoE switch via an Ethernet cable.
Before you go…
Connecting NVR to wifi router is beneficial especially if you have children and pets that may damage your system wiring.
All you have to do is to pick the right tools and then apply the above steps one by one.
Related Articles:

