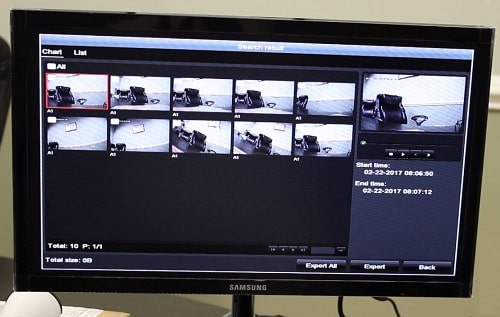
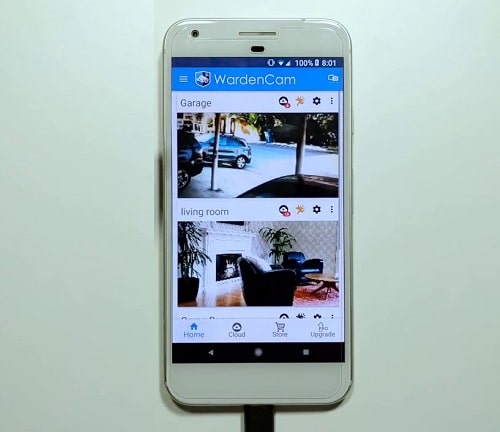
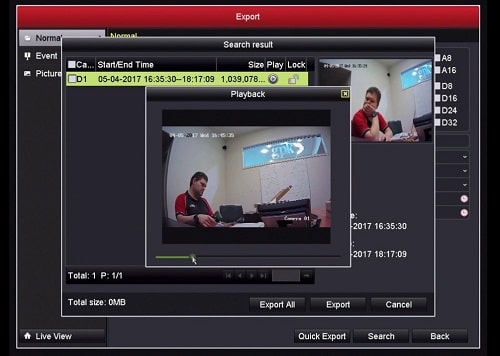
If you have a security camera, you might be wondering how to get the video off of it to view it on your computer or laptop. In this article, we will show you how to export video from security camera.
When it comes to a surveillance camera, there are many features that you can use, whether to capture video in high definition, provide live viewing from your phone, or have the camera video clip on another storage device for providing it to police.
However, the problem is that most security cameras don’t have an export function built in so that they can transfer their footage to another device.
So, If your camera doesn’t have this function and you want to export video from it, there are a few devices and methods you can use that we have already explored.
This blog post will give you tips on how to export video from security camera installed in your house so that you never miss a moment.
All you need to do is stay with us for some time and we assure you will not get disappointed.
How to Export Security Camera Videos to an External Device from a DVR/NVR?

To export videos from a security camera, you will first need to know what type of security camera you have. Is it an analog CCTV camera or an IP camera? Is it stored on a hard drive of the DVR/NVR or is it a standalone camera that is stored on an SD card?
Moreover, is the storage space of the camera is large enough or it’s limited?
Anyway, there are a few different ways to transfer a security camera video to an external device from a DVD/NVR. All you have to do is to get one of the best Hard drives for security camera installed on your video recorder and the task will be so easy.
Mentioned below are the most recommended methods:
Method 1: Export Video to a USB
USB drives are considered one of the most common storage devices that are used for transferring videos, and images from one device to another.
The reason why a large number of people choose USBs is that they are cheap and easy to use, unlike traditional HDDs.
For exporting surveillance camera videos on USB flash make sure you get a USB from a trusted brand, also ensure it has enough storage for your videos.
Now, let’s dive and see the steps one by one on how to export video from a security camera to a USB.
1. First of all, log in to the DVR/NVR.
2. Then, connect the USB to the USB port of NVR/DVR.
3. After that, go to the top menu.
4. Now, click on the device “Management” option.
5. A menu will appear on the display screen, select “Advanced Settings” on it.
6. Decide which channel you want to export its videos from your DVR/NVR.
7. Once you open the camera channel, select between “Normal” or “Event” to watch your camera videos based on your selection.
8. Finally, choose the videos you need to export, pick the date and time of export, and select the export tab at the bottom of the page.
9. After watching the videos, ensure that are the video clips that you want.
10. Next, click on “Export”.
11. Choose the destination folder on your USB and there you are. That’s all.
For more info, watch the next video
Source: Preventia
Now, the DVR/NVR videos are exported to the small USB flash, You can take it and install it on any device you want such as a PC or laptop, and in case you want to view security camera videos on a big screen you can insert it to your smart TV.
Method 2: Export Camera Recorded Videos to Computer
While exporting security camera videos to a USB drive is a good option sometimes it’s useless because of the small storage size.
To solve this issue, some homeowners tend to export video from security camera to their personal computer hard drives directly as their computer HDD has a lot of free storage space than small USBs.
For the process, Here are the steps
1. First of all, take the hard drive of the NVR/DVR and connect it to your laptop or computer via a docking station or USB converter.
2. Click on “Local Disk” and assign a path.
3. Now you have access to the videos inside the hard disk of NVR.
4. Select the camera videos that you want to transfer.
5. After choosing the required videos, highlight them, then click on “Copy” or “Cut”.
6. Go to the new file that you want to transfer videos in, then click on “Paste”.
After finishing this process, take the DVR/NVR hard drive and reinstall it to the metal box of the video recorder, tie its screws, and then turn on your DVR/NVR again.
How to Export Security Camera Videos to an External Device from a Cloud Storage?
Exporting security camera videos from cloud storage is one of the easiest options that you can do to get your job done within minutes.
Every cloud storage has an easy-to-use platform and offers free storage. In addition, the cloud storage order each day in a new folder and named with the day date.
To get these videos out of your cloud storage account, you can follow the below steps.
1. First of all, make sure you’re enabling cloud storage on your security system settings.
2. There are a lot of cloud storage platforms that support security cameras, but the most popular options are “Google Drive” and “Dropbox”. Select any one of them.
3. Once you have logged in, select the camera type.
4. Choose the upload type and pick the record.
5. After that enable the “Event Upload” option.
6. Now, select the “Double Stream” option, click on “OK” and then “Save”.
7. Next, proceed by clicking on “Line Cross Detection” and pick the camera of your choice.
8. Then, select the “Linkage Method” and choose the option of your desire.
9. Click on “Live View”, go to Configuration, and select “Rules”.
10. Then pause the stream and let the videos/images get uploaded.
11. Go to the Dropbox destination folder and there you will get the videos.
Note that, the above steps may differ from one platform to another one. In general, you can apply some of the mentioned steps above to any platform.
Also, you must be careful when you start exporting these videos from the cloud storage because if you delete them, then you can’t restore them in most cases.
How to Export Video from Security Camera By Using Mobile?

Not all security system owners have computers or connect their video recorder to a big screen for doing one of the exporting methods mentioned above, some of them need to export videos from their mobiles.
Aside from the other benefits of this method, exporting camera video clips from mobile is helpful and considered the best for anyone who is away from home for a long time.
Furthermore, it enables homeowners to take backups for their system videos even if they do not exist beside the DVR or NVR.
Anyhow, To export the video from the security camera system via mobile, Take a look at the steps mentioned below:
1. Log in to your security camera system via the mobile app.
2. Click the “Play” button and watch the video of your choice.
3. Narrow down the timeframe of the video that you want to export.
4. Hit the “Download” icon and the selected timeline gets highlighted.
5. Now press the “Start Download” button.
6. After the download is completed go to the top left icon and pick it.
7. Select the “File” option and there you can see the video that has been downloaded to your mobile app.
8. To export it to your mobile storage you can go to the option of “Save” and then you are done with the export.
The security camera footage or video is exported to your mobile phone, after that, you can easily send it online to another person, or transfer it via Bluetooth to other mobiles, or laptops.
How to Export Video from Security Camera By Desktop App?

Indeed one of the simplest and hassle-free ways to export video from your security camera system is to use a desktop application i.e. CamViewer, Reolink Client, etc.
Following is the step-by-step guide to doing so:
1. Launch the security camera viewing software on your PC.
2. Click on the “Gear” icon at the upper tile of the screen.
3. Go to the “Navigation” menu and select “System Configuration”.
4. Press on “File Path”, and decide the location where you want the exported video to get downloaded and saved.
5. Select the “Save” option at the button on the screen.
6. Now you can readily export the video from the NVR hard drive to the computer.
7. Log in to your security camera system and go to the “Remote Playback” menu.
8. Use the calendar on the top left of the screen and find the clip you need to export.
9. Finally, Hit the “Download” icon below the playback monitor. And that’s it, the video has successfully been saved to your computer.
Summary
We expect that at this stage of the article you have gained some effective knowledge on the topic of interest. Undoubtedly the above-mentioned ways and methods will surely prove to be beneficial for you.
Based on our in-depth analysis the best and the most efficient method to export the video from your security camera system is by using a mobile app. Moreover, the added advantage of this mode is that you can download the video remotely.
Have you ever tried exporting a video from a security camera system? How was your experience with it? Which mode did you use for executing the thing? Were you successful in exporting the video? Do share your opinions and experiences in the comment section below.
In relevance to this blog post if you have any queries then you are most welcome and we will try to resolve your question to the best possible extent.

