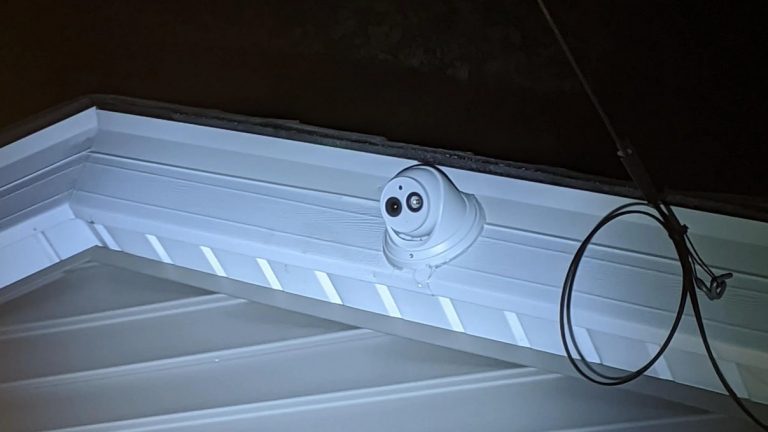
A lot of professionals don’t know how to install security camera on fascia and they are using the old methods for installing surveillance cams.
The old techniques in the CCTV system installation are to mount security cameras on concrete buildings, walls, or soffits.
These places are considered the best if you install a camera system in a business, office, or garage but for homes, it’s not.
In the past, surveillance cameras were used only in public places, especially in markets and malls.
But now the Installation of security cameras has become a need of every house.
Nowadays, People care more about security and safety due to the increase in crimes and vandalism.
So, they love to have cameras to monitor all the places in and outside the house.
The front door, back door, first-floor window, and driveway are good places to install cameras in, but the best overall is to install security cameras on the soffit, especially the fascia part whatever vinyl or aluminum soffit.
Where is the Fascia part located and is it beneficial?
Fascia that is also known as vinyl soffits located in the middle between the soffit surface and the gutter, it’s used to balance the temperature in the house.
It’s a good place for mounting cameras because it’s high enough to cover every angle of your outside area. Moreover, fascia keeps your house and attic safe from extreme weather conditions. you can install security camera on the Vinyl Siding, fascia, or gutter.
So let’s get started and see
What are the Tools Required Equipment to Install cameras on Fascia?
Installing security cameras on the fascia/ceiling requires a lot of equipment and devices, unlike other materials.
So, most people are thinking about hiring installers to do this task but there is a small drawback which is it will cost a lot of money.
So, if you want to install security camera on fascia in the right way.
Here is the list of equipment required for the installation of cameras on the Fascia:
• An IP camera or any other CCTV analog camera.
• Long ladder.
• Non-marring pry equipment.
• Hooks or clips when you don’t want to make a hole in the wall.
• Hammer, drill, drill bits, screws, and chalk.
How to Install Security Camera on Fascia Steps
Installation of security camera on the fascia has following steps:
First, you need to select an appropriate location. If your main purpose is safety then you should fix the camera at the entrance of the house. After selecting a good ladder, collect all the items you would need to install the camera. Mark the holes and drill them. Then attach the camera to the vinyl soffit and check whether it is working properly. You are done.
If you feel it’s hard, Don’t worry! Below are the details on steps and tools.
Step#1: Select the Best Location
The first step before you start to install security camera on fascia is to decide where exactly you need to mount your cams.
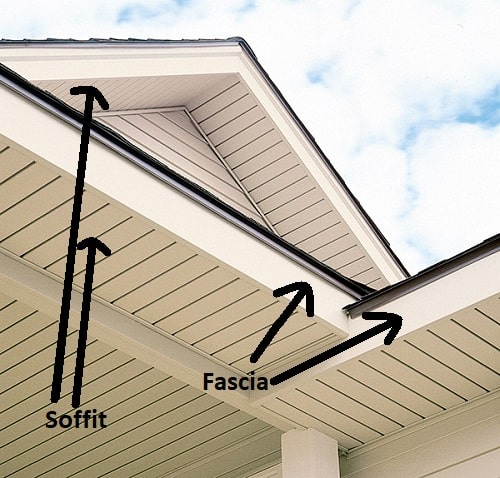
You can decide the camera placement according to your needs. So, you can install it on the aluminum soffit, or concrete buildings, or wherever you want.
Just make sure it’s suitable to capture everything that happens in your area. It is recommended to monitor all the walls of your house. But you’ll need more than one camera which may be expensive.
So you can attach one camera at the entrance and the other outside of the house covering the street or road.
Fix the camera in a heightened place so that no one can reach it. The length should be at least that much high that it cannot be accessed without a ladder.
Note1: Make sure that there are no bushes, trees, or buildings that may hide the camera.
Step#2: Choose a Strong Ladder
The second step in how to install security camera on fascia is to bring the ladder to the camera location.
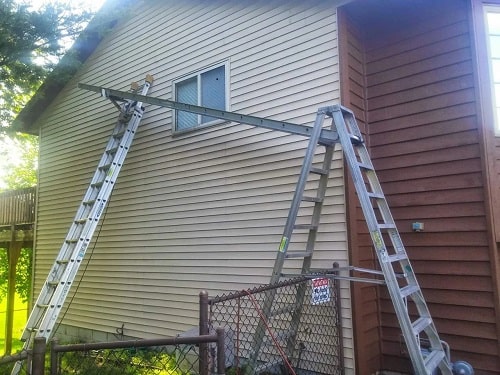
Choose a ladder that is strong enough to bear your weight, you can purchase an aluminum Multi-position ladder for future needs.
If you do not have any you can borrow them from a nearby garage if possible.
Then, to avoid accidents and damages to equipment, you can ask your brother, any family member, or a neighbor to hold the ladder while you climb.
Note2: To save your time and energy, collect all the things before you climb the ladder.
Besides the camera, you will need screws, markers or pencils, a drill machine, wires, and connectors.
Step#3: Clean the Place and Remove the Soffit
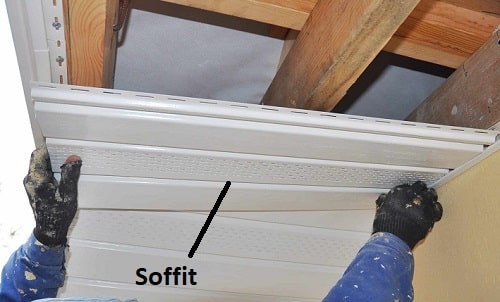
Once you finish choosing the camera location, then you should go to this place and clean it.
After that, remove the vinyl soffit by using non-marring pry for the camera installation process.
Now, check the desired area and see if there is anything behind the fascia or not?
If you are found, you should change the camera location. If not, cut a piece of wood and mount it behind the fascia area where you want to install the security camera.
This wood piece will be used as a supporter for the camera and it will be helpful if you have a heavyweight camera, the wood will hold it.
Step#4: Mark the Holes for Screws and Start Drilling
This is the most important step in how to install security camera on fascia.
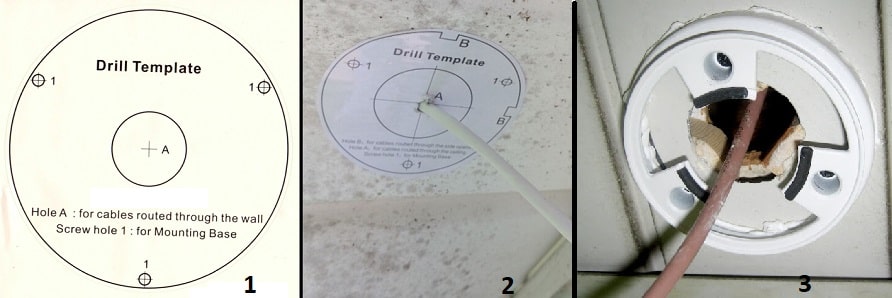
First, bring the mounting template that is included in the camera box.
If not you can use the mounting bracket and measure the size of the camera, and then mark the holes from where you will pass the wire and screws.
Second, Make sure that there are no objects on the other side of the wall.
Third, Measure the thickness of the fascia surface from outside to inside to use a suitable drill bit. Put the wood piece thickness in calculations.
Fourth, Turn on the drill device and start drilling the marked holes.
Fifth, Put the camera mounting bracket and start to tighten the screws to fix the camera base body.
Note3: Be careful while drilling and avoid moving the drill in any other direction.
If you do not want to make holes and install the security camera without screws in your fascia you can use clip hooks.
But you will need a great setup to fix the wires so it is better to use a drill machine and make holes.
Reminder: If you have a Wireless or Wire-Free security camera you can skip the next step: it’s for wired systems.
Step#5: Install the Weatherproof Connector and Run security camera wires
Besides drilling holes for cameras, there is another important step that you should take care of which is running security cameras wires.
This step can cost you more money depending on the system you installed.
The wired surveillance systems are Analog CCTV cameras with DVR, or PoE IP cameras with NVR.
The installation procedures are the same but differ in quality of pictures, and system features.
Now, to run security camera wires through the soffit you should:
First, Plan where your system wires and cables will pass, decide exactly the wire route.
Second, Use fish tape and attach one end of your camera cable with the start of the fish tape. A fish tape is a small tool used to pull and pass wires in narrow places, it’s suitable for Coaxial and Ethernet cables.
Third, Pull the fish tape in the camera location, and then separate the cable from the fish tape.
Forth, Pass the camera main feed cable through the wide hole you make in the fascia.
Fifth, Install a weatherproof connector on the edge of your cable. It protects your camera from harsh weather conditions.
Note4: Be careful when you pass the wires through holes and you must secure the cameras with screws that are mostly given with them.
Step#6: Attach the Camera
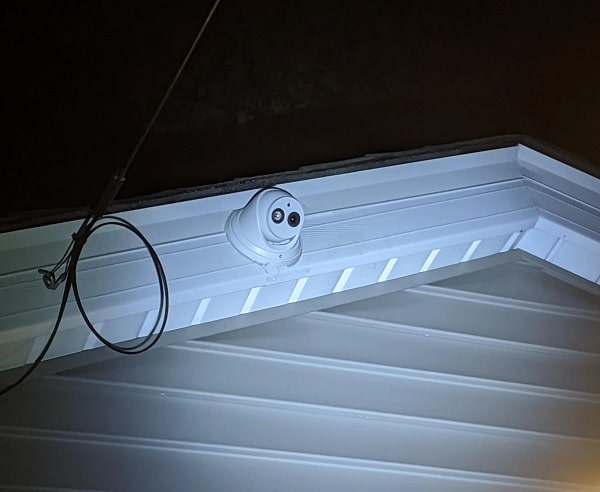
After making holes, installing the mounting bracket, and running security camera wires, now it’s time to attach the camera.
Bring your camera from the box and start to attach it with the mounting bracket you installed before.
In case you’re using a CCTV camera not a PoE cam then you should mount your camera near to the power source, if you don’t have you can pick a power extension cord.
Once you finish, check to see if there is any cut or bend in wires or cables to avoid wiring problems. After that, Direct the camera to monitor your area and record videos.
Step#7: Turn Camera On
The step before the last in how to install security camera on fascia is to turn the cams on and check whether it is working properly or not.
Now, you can monitor the recording of your home, office, or any favorite location.
Step#8: Install the Security Camera App and Adjust the settings
Now, it is easy for you to monitor your house when you are not at home.
You can check the camera footage on your smartphone by using the remote viewing feature existing in security cameras.
So, download the security camera app that is compatible with your camera system. After that create an account with a username and password.
The next step is to log in with your account and adjust the system settings such as motion detection, night vision, and where to store recorded videos, ..etc.
Tools Recommendations
Before I start to install security camera on Fascia, I bring the suitable tools that may use to complete the installation task.
The tools listed below are easy to use and don’t require a knowledge base, each device has its own manual to guide you on how to use the device in a correct way.
1- NoCry Safety Glasses: Eye Protection glasses, Put them on your face to protect your eyes.
2- DEWALT Hammer Drill: Powerful Hammer for making holes on the fascia.
3- Non-Marring Tool: To remove soffit parts.
4- BOENFU Wire Cutter: 6 Inch Cutting Pliers to cut extra inches in wires or cables.
5- Little Giant Ladders: Multi-Position Ladder to help you in heights, especially fascia.
6- Ximytec Screwdriver: Cordless screwdriver to tighten any screw of mounting plate or conduits.
7- Swann BNC Coaxial Cable: 100 Ft / 30 M cable for CCTV DVR System.
8- ZOSI Cat5e Ethernet Cable: High-speed 100 Ft / 30 M Ethernet cable For Network Video Recorder and PoE system.
Conclusion
To install security camera on fascia is not rocket science but it can be a little bit tricky.
If you follow all the mentioned steps here then you will finish your task successfully without paying dollars for hiring professionals.
The steps above are based on our experience in installing a lot of surveillance systems in the last years. So, you may neglect some steps if you have an alternative way to do it.
