Nowadays, installing security camera systems has been more flexible than before.
The old type of surveillance camera is CCTV analog cameras mounted only in specific locations unlike the new generations of monitoring cameras.
These days there are different cameras such as wired, wireless, and wire-free cams.
Depending on the surface you want to put your security system on, you can pick suitable cameras.
In general, both old and new cameras can be mounted on brick walls, soffits, and elevators of large buildings to add more safety to these places.
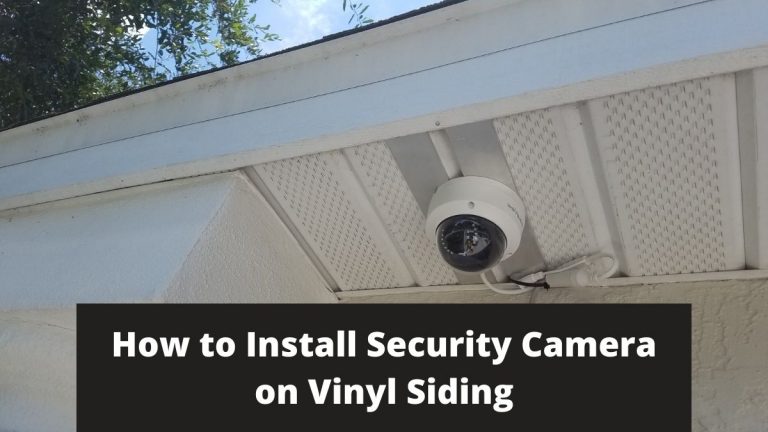
In this guide, we dive into how to install security camera on Vinyl Siding and what are the tools and devices required for the installation process.
Before you are going to install security camera on vinyl siding, you have the following options to choose from:
- Scenario 1: Mount the cameras underneath the vinyl siding.
- Scenario 2: Use screws and a Mounting template.
- Scenario 3: Mount security cameras with screws using vinyl siding hooks.
- Scenario 4: Install the security camera on the outer part of the wood by using Adhesive tape.
These are the 4 common modes that you go through in case you want to mount security cameras on Vinyl Siding.
What Are The Requirements for Mounting a Security Camera on Vinyl Siding?
Installation of the camera on vinyl siding can be done by using the general installation kit with some additional requirements such as that are given below:
- Mounting Template.
- Drill and bits.
- Anchors and screws.
- Hammer.
- Cutters or pliers, crimpers, and connectors.
- Cat5e/Coaxial cable.
- Adhesive tape, and ladder.
What are the Best places to use in installing a security camera on Vinyl Siding?
Most of the security cameras are installed to monitor the high-traffic areas surrounding the house.
Mainly, this is for the monitoring of every person around the house. The most common placements for the installation of security cameras are listed below:
- Main Front Doors.
- Above first or second floor windows.
- Backdoors of house.
- Outdoor areas such as Backyard, parking area, and garage.
- Home driveway, and stairs.
Keep in mind to mount the camera at a height that no one can easily reach there.
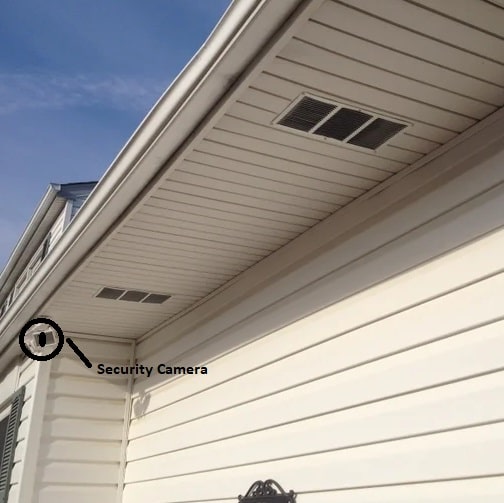
But cover the maximum footage of the home’s entrance or surrounding areas from that height. You can install a security camera on the fascia part of the soffit, it’s considered the best high place.
There are many models of security cameras available in the market, and each cam has a different resolution.
So, check the resolution of the security camera is it HD, FHD, or UHD before installing to see if it captures clear images or not?
When to Start installing Security camera on Vinyl Siding
Vinyl Siding surface is not like other types of home surfaces, So when you tend to install security camera on Vinyl Siding you must put some important points in your head.
One of these points is how the weather could affect the installation of the security camera process.
For example, If you’re gonna install security camera on Vinyl siding during winter you may face a big problem.
The problem is your vinyl siding can break because of low temperature. So as a fast solution you must warm the siding before installing it for a few minutes, you can use a hairdryer.
Another solution for this issue is to wait until summer. The summer is the excellent season for the security camera installation on vinyl siding.
How to Install Security Camera on Vinyl Siding Steps
The installation process is easy if you’re a beginner and have zero experience in installing surveillance systems.
To Install security camera on Vinyl Siding you just need to first select a suitable location for your camera. Then use a pencil or marker to mark screw and wiring holes. Second, turn on the drill and drill the holes, then connect the cameras with DVR/NVR. At last, Install the security camera and tighten the screws, Then connect the cameras to the TV and set up the settings.
The below steps are fairly straightforward but there are some tips that you should pay attention to.
Step#1: Select a Suitable Location for Your Camera

Vinyl Siding is considered one of the best places to put security cameras on.
But, there is a small issue with the Vinyl Siding surface which is that not every spot of the soffit will be suitable to install a security camera in.
You need to choose good placements that cover most of your home and property.
Moreover, you are required to install cameras in high places away from thieves and burglars.
So, choose the high wide angle location to mount your camera in, and then think about the power sources of the cameras.
If your cameras are wired or wireless you need to mount them near the power outlet.
On the other hand, Wire-Free cameras that are powered by batteries and charged by solar panels must be in a good place for receiving sunlight.
If you have Aluminum soffit Learn How to Install Security Camera on Aluminum Soffit
Step2: Use Pencil or Marker to Mark Screw and Wiring Holes
After selecting the suitable angle for the camera you need to mark the screw and main cable hole for your camera.

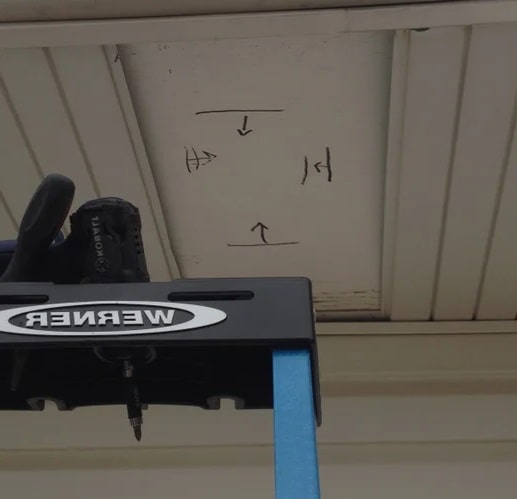
Put the security camera mounting bracket at the desired location and mark it.
1- Place the mounting bracket on your vinyl siding where you want to install a security camera.
2- Use your Pencil to mark all necessary holes where you will insert screws later. If you are going to establish a wired security camera, you must make extra holes for the main cable and power wires.
3- Make the marks in a way that can be seen easily. Don’t use invisible markers or pencils for markings.
4- Remove the top part of the Vinyl Siding and check if the siding surface is ready for drilling or not? Also, you must check the area beneath the siding and see what is used, is it masonry or wood?
Note1: get a strong ladder that will easily reach the installation angle. Also, keep the tools and any other equipment that you may use with you.
Step3: Turn on Drill and Drill the Holes
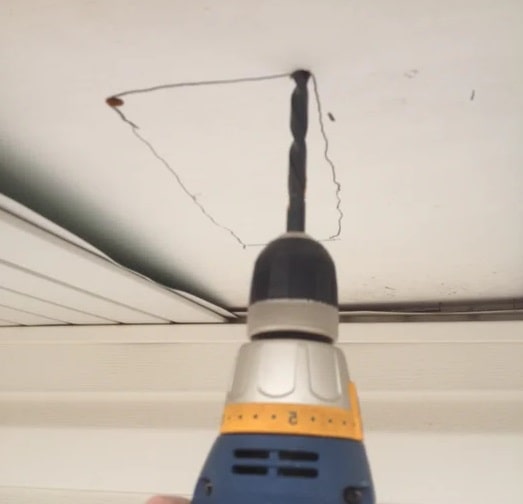
The third step in how to install security camera on Vinyl Siding is to turn on the drill tool and start making holes by using the right drill bit.

1- Carefully select a drill bit that can fit your surface and enter the siding easily.
2- Before you make the first point of the hole, measure the exact depth of vinyl siding. After that, select that drill bit that is one inch longer than the siding.
Note2: For the correct screwing, you must keep your hand steady and not move the drill UP and Down.
3- Start from the exterior side of the Vinyl and If the material beneath the siding is wood, stop the drilling or replace the drill bit with a smaller one when you reach the endpoint.
Note3: During drilling in the wood don’t go further than 1 inch to avoid hitting a hard obstacle in the back of the Vinyl or building structure.
4- Now place all mounting tools at their markings that you have made earlier and insert them using a drill.
5- Do the same with the other markings and start to drill them.
In case you’re using a wireless security camera, you can stop drilling after making screw holes.
On the other hand, if you are using a wired security camera, you need to use a large drill bit for the wires.
Step4: Connect the cameras with DVR/NVR
This is the most important step in installing a security camera on Vinyl Siding surface.
Security cameras mounted wherever home, business office, or garage will be useless if you don’t make the system connections correctly.
So, to avoid wiring problems or signal loss issues in the case of wireless security systems follow the below steps.
First, Let’s start with wired cameras connections
CCTV cameras are cameras that use two cables one for signal and the other for power.
1- Run the security camera coaxial cables from the CCTV camera output by using BNC connectors (male, and female) to the input of the DVR (Digital Video Recorder).
2- For power wires, there are some cables that have two wires, one for Coaxial cable, and the second for power.
3- If you want to pick a separate cable for power and another cable for signal do it, But it will cost you more money than a single cable.
4- Connect the power connector of the camera to the power adapter, and then plug in the adapter in a nearby power outlet.
Second, Wired PoE cameras Connection
PoE cameras are power over ethernet IP cameras that use one cable for power and data.
1- Measure the Distance between the PoE IP (Internet Protocol) cams and the central device which is NVR ( Network Video Recorder).
2- Purchase a Cat5 Ethernet cable, and then Use RJ45 connectors on both ends of the cable.
3- Connect one end of the cable to the PoE camera and the second end to the NVR port.
4- If you have a large number of IP cameras you can use a switch to connect all the cameras and then link the switch with the NVR.
Third, Wireless cameras Connections
Wireless cameras are cameras that use only one cable for power and data between the NVR and the cameras send wirelessly.
1- Mount the wireless security cameras in a wide place where there is no object that could obstruct the WiFi signal.
2- Always keep your wireless cameras near the wifi router and the power outlet.
3- Use a wifi range extender in case you want to mount your cameras far from your home.
In case you have a wire-free camera such as Arlo, or Reolink you can use the above steps of wireless security camera installation.
Step#5: Install the Security Camera and Tighten the Screws
The next step after finishing system connections is to install the cameras on Vinyl Siding.
Put the equipment near the holes tightly and screw it, then use a drill to do it properly.
Now, you reach the end of the installation process, just adjust the camera angle and direct it to where you want your cam to capture images.
Step#6: Connect the cameras to the TV and set up the settings
The last step in how to install security camera on Vinyl Siding is to configure your DVR/NVR and Set up the camera.
First, Connect the DVR/NVR (where you store your recorded videos) to the monitor screen by using an HDMI or VGA cable.
Second, open the video recorder setting page and ensure that everything is set up according to manual guide instructions.
Third, adjust the remote viewing and the other features of the camera such as night vision, motion detection, and 2-way audio.
Now you’re complete installing a security camera on a vinyl siding task and you can turn on your system and test it.
Tools Recommendations
As security camera installers we install a lot of wired, wireless, and wire-free cameras inside and outside homes and companies. Also, we run security cameras through walls, install a complete DVR camera system, and go far away and mount security cameras without screws.
So, based on our experience in surveillance systems here are the best tools for you to use in the installation of a security camera on Vinyl Siding.
1- NoCry Safety Glasses: To protect your eye during installation.
2- DEWALT Hammer Drill: Powerful Hammer used to make holes, come with 3 different speeds and 40 pcs.
3- Little Giant Ladders: Multi-Position Ladder made from Aluminum that will help you in heights.
4- Ximytec Screwdriver: Cordless screwdriver with 45Pcs Screw Bits which is enough to tighten any screw.
5- Swann BNC Coaxial Cable: 100 Ft / 30 M cable suitable for CCTV System with analog cameras.
6- ZOSI Cat5e Ethernet Cable: For PoE IP System with 100 Ft / 30 M that supports high-speed.
Conclusion
Above is the step-by-step Ethernet security camera installation guide on the vinyl siding.
What tools or items you need for this installation procedure are also mentioned in this article.
It is not easy to install the camera on vinyl at a low temperature, so heat the vinyl first and then install the camera on it.

