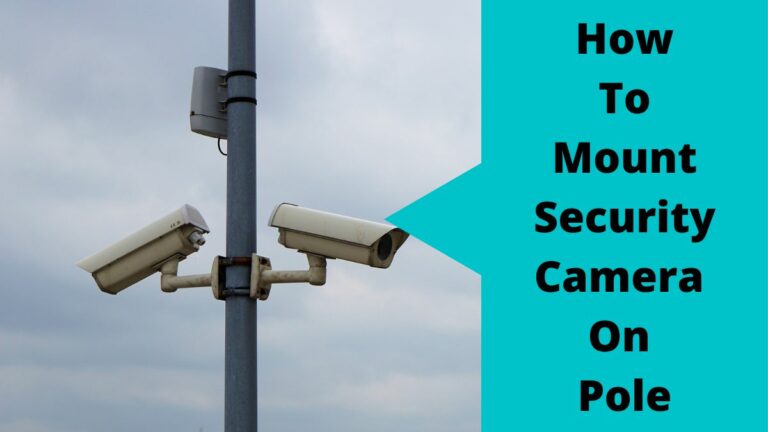
Did you know that you can mount security cameras in more than one place inside your property? The locations of cameras vary depending on your needs.
For example, you can install your camera in the attic, on walls, metal poles, outside trees, or underground.
All these spots have pros and cons, so you have to choose the best location for your cameras that maximize the benefits you get from the cam place.
In this post, we dive into details of how to mount security camera on Pole and also we mention the benefits of it.
What are the Benefits of Mounting Security Cameras on Poles? (Pole Mounted Cameras Advantages)
Mounting your security cameras on the pole has several advantages that anyone dreams of.
First, Installing your surveillance cameras on the outside pole gives you a better view because the cameras are mounted higher up off the ground.
This can be beneficial if you’re trying to monitor a large area such as your backyard, garage, or street windows.
Second, Pole-mounted cameras are less likely to be vandalized than those that are placed at ground level.
In other words, the cameras that are installed in easy-to-reach places such as windows, or on walls are exposed to damage or steal with high percentage than others.
See Also: Best ways to keep your security camera from being stolen.
Third, Mounting cameras on a tall pole makes them more effective overall as you compared to other CCTV surveillance camera locations.
For example, it becomes more difficult for criminals to tamper with, stop the camera by laser, or block the camera view when it’s placed in far spots from people’s sight.
Forth, Unstoppable power supply if you have a wired security system installed around your house.
What I mean is if you mount your camera on a pole near an electrical outlet, you can ensure that it always has power and can’t be easily disconnected.
Now
How to Mount Security Camera on Pole? (3 Methods)
Many beginners stop mounting their security cameras on poles because they think it’s difficult and takes too much time.
However, there are a large number of homeowners who still want to mount security cameras on poles to enjoy its benefits.
For this purpose, we write detailed 2 methods with details for the mounting process. Let’s see
Method 1: Mount Security Camera on Pole Using Conduit Mount
One of the simplest ways to mount security camera on pole is to use a conduit mount for fixing the camera on the pole, and then start to adjust the other elements such as the viewing angle, and tighten the screws.
Anyway, if you have never installed a surveillance camera, or you do before but forget the steps, then you can rely on the below steps to learn how to do this task.
Step1: Purchase An outdoor security camera
The first step to mount security camera on pole is to purchase an outdoor security camera.
This will ensure that your camera can withstand the weather elements and continue to work correctly, even if it’s raining or snowing outside.
All you have to do in this step is to take your time and do the full research, then choose the camera that meets your specific needs as there are many different types of security cameras on the market.
Step 2: Get a Suitable Pole Ring
As the pole has a circular shape, then we should use a ring with screws to help us keep things fixed on the poles.
For a security camera, we’re gonna use what is called a Pole ring. This ring is a small, metal ring that helps you to attach your camera to the pole.
Once we do this the camera will be securely attached and won’t fall off, even in high winds.
Aside from protecting the camera from falls, Pole rings are relatively inexpensive and can be found at most hardware stores.
The only thing that you need to do if you decide to use this pole ring is to make sure that the ring is made of sturdy material such as metal or plastic, and that it’s the right size for your chosen pole.
Step 3: Use a Conduit Mount Inside the Ring
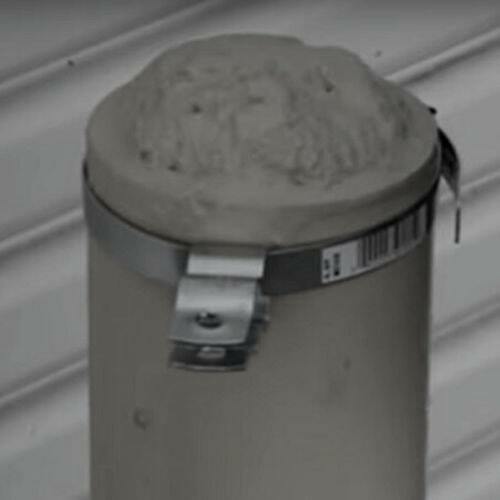
As most outdoor security cameras come with mounting plates attached to a small arm that link the camera body to the plate we should use a conduit mount inside the ring.
For normal situations, a conduit mount is used to protect electrical wires from moving or falling.
In our situation, It’s ideal for use with security cameras as it will secure the camera in place and ensure that it doesn’t move around when mounted on the pole. Plus, it’s weatherproof and can withstand snow, and heavy rainfall.
Pro Tip: Before you gonna use the metal ring, make sure you put a rubber gasket between the ring and the conduit mount to prevent corrosion.
Step 4: Install the Security Camera on the Conduit Mount
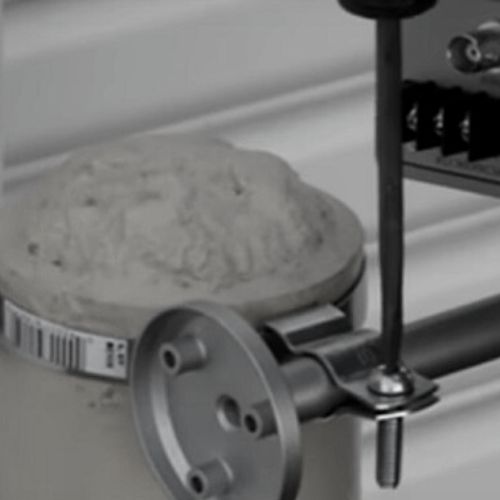
Nowadays, most cameras come with installation instructions in different places. Unfortunately, few manufacturers provide a guide on mounting security cameras on poles.
Anyway, after you pick a waterproof security camera, pole ring, and conduit mounts correctly, then you must attach the camera arm inside the hole of the conduit mount. Let’s see how
If the camera is previously installed and you need to change its location and mount it on a pole, then you should remove the mounting plate.
On the other hand, If it’s a new camera, then you don’t need to attach the camera arm to the mounting plate, you can install it without the plate.
In both situations, all you have to do is put the camera arm inside the conduit mount, and after that start to tie the screws of the conduit on the camera arm.
Pro Tip: Don’t tie the screws of the conduit tightly on the arm of the camera, try to keep some space for the next step.
Step 5: Make the security camera connections
As we know there are 3 models of security cameras wired, wireless, and wire-free. If you have any of the last 2, you can skip this step.
In case you have a wired CCTV analog or IP PoE camera, then you need to make the wire connections for power, and data.
Except for wire-free battery-operated cameras, there are wired and wireless cameras that are powered by a power adaptor.
If you have any of both cameras, then you have to route the power wire around the conduit to protect it, and after that connect the power cord of the camera to the nearest outlet.
Repeat the above instructions with the coaxial cable of the CCTV camera or the Ethernet cable of the PoE cam, and try to choose the best path for the wires until you reach the video recorder DVR or NVR.
Once you make the power connections to the system, thereafter try to connect your camera to the home WiFi network.
By doing this you have permission to access the cameras remotely from your smartphone or tablet when you’re away.
Step 6: Adjust the Camera Viewing Angle, and Tighten the Screws
After finishing attaching the camera arm inside the conduit mount, and fixing the screws of the pole ring, you have to turn on the camera and check the viewing angle.
First, Direct the camera to the area that you want to monitor.
Second, Turn on the camera and open the application of the camera on your phone.
Third, Check the viewing angle, and try to adjust the focus of the lens until you get the best clarity you need for your videos.
Forth, Once you’re happy with the angle, tighten the screws of both pole rings, and conduit mount to secure the camera in place.
Now, everything is ready and you can turn on your whole system to start monitoring and protecting your favorite area.
Step7: Cover the Camera
While outdoor security cameras do a great job of monitoring the outside area but they are also damaged rapidly due to dust and rain.
So, in the last step of how to mount security camera on pole, we’re gonna cover the camera to protect it.
The cover we’ll put on the camera will not only protect it from harsh weather but also keep it clean from insects, bees, geckos, and birds.
Aside from its benefits, a security camera cover or box is cheap and you can buy it or make a new one in your home from a cartoon, or wood with the size that fits your camera.
Anyway, you can watch the next video to see the steps in a practical way
Source: Discount Low Voltage
Method2: Mount Security Camera On Pole by Using Mount Bracket
In the past, homeowners have limited options when they purchase a surveillance system and think where to install it.
Nowadays, everything is changing, and the security camera’s old installation process is changing with new and creative ones as the old processes waste a lot of time and money to achieve what you want.
However, if you don’t need to mount a security camera on a pole by using the first method, or find it hard for you to apply the above steps, then you can go forward with the next steps.
Let’s see
Step 1: Purchase a pole mount bracket
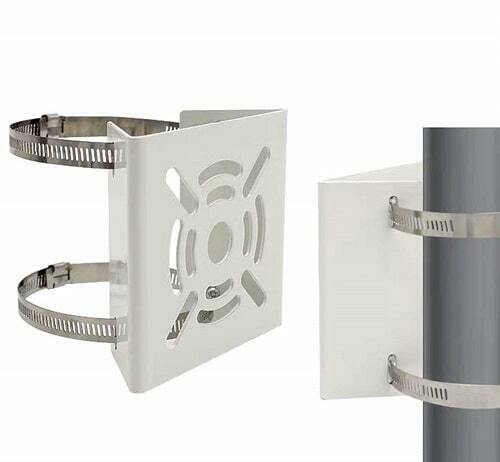
There are a lot of mount brackets with different shapes available in stores. These brackets can be used to mount security cameras on exceptional locations such as poles, trees, or fences.
For example, you can pick one of these brackets to help you mount your security camera on the pole by just attaching the camera to the mount bracket.
Note that, before you buy any of the mount brackets, you should ensure that the bracket is suitable for your camera, and it doesn’t have a different shape.
Step 2: Install the mount bracket to the Pole
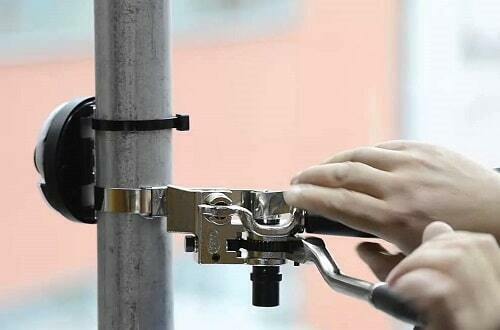
Once you pick the pole mount bracket, then you need to decide where you want to set the camera on the pole.
After finishing choosing a suitable spot on the pole for the mount bracket, then you can remove its screws and start to attach it to the pole.
Pro Tip: before you tie the screws of the mount bracket make sure that the camera connection wires and power cable pass through the pole mount bracket.
Step 3: Attach the security camera to the mount bracket
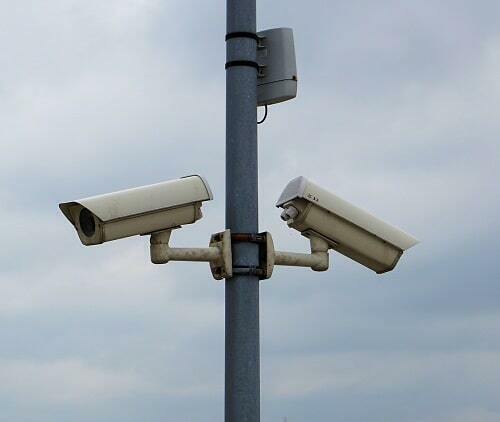
Now, everything is ready and you can bring your CCTV outdoor camera and attach it to the mount bracket that you installed previously.
Turn on your screwdriver and start to tie the screws of the camera one by one until the camera becomes fixed in its place.
Step 4: Make the camera power, and signal connections
As you previously pass the wires, and power cables through the pole mount bracket. Take the power wires if you have wired surveillance cameras and connect them to the nearest power outlet.
On the other hand, if you have a wire-free camera, then you don’t need to run any power cables for your camera.
For signal, hold the coaxial cable if you have a CCTV camera or the Ethernet cable in case of a PoE camera, and connect these wires to the video recorder whatever NVR, or DVR.
Step 5: Turn on the Camera and adjust the settings
The last step after you apply the above steps is to power on the camera and test it, turn on the camera from the power button, then link it to your home wifi router, after that start to set the settings for your security system on the DVR or NVR.
The moment you complete the setting setup, start to adjust the camera viewing angle to ensure that the camera is directed to the desired area.
For more info about this method, watch the next video
Source: Axis Technical Support Videos
Method 3: Mount Security Camera On Pole by Using Metal Plate
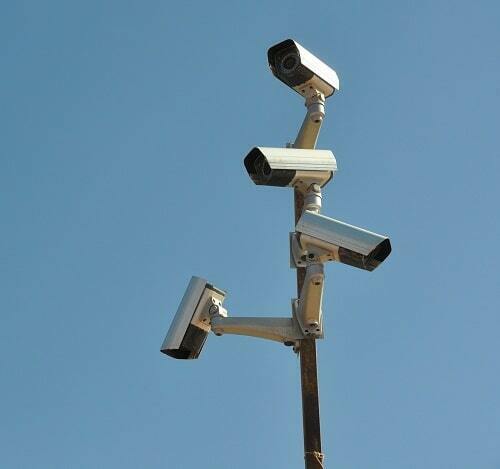
There is one more way that we used previously to mount security camera on pole that helps us to do the task without paying extra money for a new pole mount bracket or involve in using a conduit mount.
This method depends on using a small metal plate and then welding it to the pole, after that installing the camera on it.
Let’s see the steps
Step1: Get a high-resolution outdoor security camera from any trusted brand.
Step2: Find a small piece of metal, aluminum, or stainless steel plate that is strong enough to support the weight of the camera and its connections.
Step3: Place the mounting bracket of the camera on the metal plate, and with a pencil start to mark signs inside the holes of screws.
Step4: Use a screwdriver and on the signs that you made previously, start to drill the holes in the metal plate.
Step5: Once you finish making holes, bring a welding machine and start to fix this metal plate to the pole where you want to mount the camera.
Step6: Attach the surveillance camera to the metal that you weld using heavy-duty screws or bolts.
Step7: Make the camera connections, then turn it on, and then start to adjust it as needed until you have achieved the desired angle.
That’s it! You’re now ready to start monitoring your property with your new DIY security camera setup.
Note that you can install a security camera junction box for future usage with the same steps, all you have to do is to pick a suitable box for the pole.
How do you make sure the security camera is mounted securely on the pole?
To begin with, use a camera mounting bracket that is specifically designed for cameras. This will ensure that the camera is attached to the pole and won’t come loose over time.
Secondly, secure the bracket to the pole with heavy-duty screws or bolts. With proper installation, your camera should be very secure and won’t budge even in strong winds.
If you’re concerned seek for more protection for your CCTV cameras, you can add a padlock or anti-theft chain to the mounting bracket for an extra layer of security.
Are there any dangers or risks associated with mounting security cameras on poles?
YES, there are certain threats associated with mounting security cameras on poles. The most obvious risk is that someone could tamper with the camera or its wiring.
Additionally, if the cameras are not properly secured, they may fall off the pole and damage property or injure people.
Are there any Benefits to Mounting Security Cameras on Ground Level Not on Pole?
As we mentioned above, each location suggested for installing surveillance cameras has pros and cons.
Above we discuss some benefits of mounting security cameras on poles. Now, we dive into the benefits of Ground-level security cameras.
- Mounting cameras on any location except poles are less expensive as you don’t need to buy a pole.
- Putting cameras on any other home place makes them easier to conceal, which can be beneficial if you’re worried about someone knowing they’re there. On other hand, Mounting security cameras on poles make them noticeable to anyone entering your home.
- Ground-level security cameras are less likely to be damaged in harsh weather conditions since they’re not as exposed as pole-mounted cameras.
If you have a low-quality outdoor camera, then you need to protect it and make it waterproof. For more on how to do it, read this blog post [How to make a Security Camera Waterproof]
Conclusion
Security cameras are used to protect your home or office from burglars and intruders. But to be effective, they need to be installed properly.
Mounting a security camera on a pole is relatively simple and only requires a few tools and materials. Be sure to follow all instructions carefully to avoid damaging your camera or pole.
