Keeping security camera footage for future use is a good thing you should seek for. In this article, we’ll show you how to record security camera on PC.
Now
Why do we need to Record Security Camera Footage?
A few weeks ago, our family went on a much-needed vacation. We had a great time and made so many wonderful memories.
However, when we came home, we quickly realized something wrong had happened. A few minutes later, we realized that our home had been broken into and some valuable things had been stolen.
The first thing that comes to our mind is to check our security system and see if it had recorded the entire thing or not.
Unfortunately, we found that the footage of the event was corrupted and we were unable to retrieve it.
We contacted our security company and they told us that this happens often because people do not know how to correctly record their security footage in more than one storage space.
They advised us to record the videos of our surveillance system on our computer, and one of the cloud storage services available so that we could avoid this issue in the future. We followed their advice and now we can record our security footage without any issues.
So, you should try to keep your footage on a computer hard drive to get it when you need it, or to view the videos on PC when there’s something wrong happening on your property or for your family, and many other benefits that we’ll mention below.
Here in this blog post, we will show you what we learn and how to record your security footage on a PC. Plus, we’ll mention some benefits of recording camera footage and videos on the computer.
Let’s see
The Benefits of Recording Security Camera Videos on PC?
Before we start to use computers as a storage space for our security system, we do wide research and contact expert advice to see which storage space is better for our case.
What we found is, there are some homeowners who love to record their camera footage on local storage such as HDD or SD card.
However, there are customers who record their surveillance camera videos online on one of the cloud storage platforms.
In our case and after taking too much time doing our tasks, we decided to record our security camera video clips on PC because of the below benefits. Let’s see
• Quality: The quality of the video is often better when recorded on a computer. This is because computers have higher processing power than most phones and tablets, so the footage can be recorded in HD without taking up too much space on your hard drive.
• Auto Recording: You can set up automatic recording schedules on your computer, so you don’t have to worry about manually starting and stopping the recording every time you want to capture footage.
• Viewing: If you ever need to watch the footage of your cameras for any reason, it will be much easier to do so on a larger computer screen than on a small phone or tablet screen.
• Large Storage Space: You can also store more footage on your computer than you could on a phone, tablet, or SD card, so you don’t have to worry about running out of space.
• Security: Recording your security camera footage on a computer is much more secure than recording it in one of the other storage spaces.
So, If your device is ever lost or stolen, the footage could fall into the wrong hands and use as they want.
But if your footage is stored on a computer, it will be much more difficult for someone to access it without your permission.
Related: How to Record a Security Camera to The Cloud.
How to Record Security Camera on PC with 6 Easy Steps?
Before you take action and apply any of the below steps for recording your security camera footage on a PC, you should have some knowledge of dealing with a camera and video recorder software.
What I mean is if you’re a beginner or have little knowledge about surveillance systems, be careful and write every step you take into a note for the case if you want to restore your system setting back.
Let’s jump into the steps
Step1: Get your security camera connected to the internet
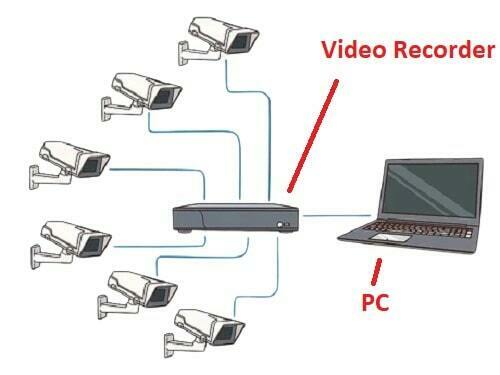
When it comes to record security camera on PC you should ensure that the camera or the video recorder are connected together and are powered on and connected to the home internet.

First, check the connections of your DVR, and NVR, and take a quick look at the power wires, or the camera battery charge level in case you have a wire-free system.
Second, ensure that the video recorder device and cameras are connected to the internet and that the signal LED indicator of the camera is on.
Doing this will allow you to access your system and view your camera footage remotely on any computer or mobile.
Pro tip: If your camera doesn’t have Wi-Fi capabilities, you can connect it to your router using an Ethernet cable, or you can get a wifi signal extender device if it’s located away from the router.
Step 2: Open the security camera PC Viewing Software

Once your system is connected to the internet, you’ll need to open the security camera PC viewing software that came with your camera.
This will likely be software that you can download onto your computer from the camera manufacturer’s website.
The moment that you’re done downloading and installing the PC software, then open the software on your device, sign in with your account login credentials, and if you don’t have an account, you can create a new one.
Step 3: Add the Cameras to the software
After the first 2 steps, you need to link the cameras to the viewing software to get full control of them from the app.
First, you’ll need to do a quick search for the IP cameras that are connected to the network.
Second, add the camera’s IP one by one to your viewing software.
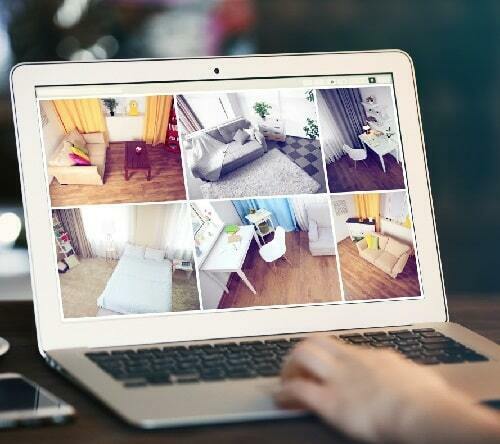
Third, Open the main page of the viewing software and the camera live feed will appear on the screen.
Once you’ve done this, save the changes and exit the software and ensure that you don’t change anything before you leave the page.
Now, everything is ready and your system components are linked together.
Step 4: Search for storage Options
After completing the above steps, then you should go for the storage options of your system and choose the option that fits your needs.
A lot of security camera brands offer both local and online storage for giving customers the variety to choose the best for them.
Anyway, whether it’s local or online storage each one has its pros and cons, but not all systems offer both options.
So, open your video recorder and check the options that exist in the storage settings.
Based on your camera manufacturer, you can find only storing on an SD card, HDD option available, or you can find stored on online storage available, or both together.
So, open your storage settings and choose the option “Save to PC” for allowing your cameras to store recorded videos on your PC.
Step 5: Adjust the setting to store videos on the PC
After selecting a PC as a storage medium for your camera-captured videos, you have to adjust the rest of the configurations.
First, you have to create a special file on your PC for saving the captured videos.
Second, adjust the recording time, if you want to record day by day, one week, or only when events happen.
Third, complete the setting so that any video captured by your surveillance cameras is stored on your PC instead of on the cloud or another location.
To do this, simply select “PC” as the location where you want the videos to be stored.
Once you’ve made this selection, exit the menu and return to watching live footage from your camera.
Step 6: Check the recordings on your computer
To check whether or not the videos are being stored on your computer, go back into the recordings menu and select “local storage” or check your computer to see if there’s any video stored in the files you choose or not.
Anyway, You should see a list of all of the videos that have been recorded onto your PC. If not, double-check that you’ve followed all the steps correctly and try again.
For more, watch the below video
Source: CCTV Camera World
How to record a security camera on a PC without needing the internet?
As a general rule, every device connected directly to a computer can send or receive data without any additional devices.
What I mean is you can record a security camera to pc without needing the internet if your surveillance camera is directly connected to the PC with a cable if it’s wired or through wifi if it’s wireless.
However, sometimes the recording process of security cameras on a PC doesn’t work smoothly as it requires specific software.
What are the differences between recording security footage on a PC & DVR/NVR?
Well, there are a lot of benefits that a user can get if he decided to use a PC instead of a DVR/NVR as a storage medium for his security system footage.
Here are the differences between recording videos on a PC hard drive, and a video recorder Hard.
Storage: PCs tend to have more storage capacity than DVRs, so you can store more footage on a PC.
Speed: PCs are typically faster than DVRs, so you can playback footage more quickly on a PC.
Usability: Most PCs come with software that allows you to easily search and retrieve footage, whereas DVRs typically do not come with such software.
Security: Recording security footage on a PC is more secure than recording it on a DVR, as PCs are less likely to be hacked than DVRs.
Price: The hard drives that are used with video recorders are more expensive than other Personal computer hard drives.
However, in some cases, the price of a PC hard drive costs more than the best DVR/NVR hard drive if it’s SSD.
Before you go…
By following these simple steps, you can easily record footage from your security camera directly onto your personal computer!
Having a digital backup of what your camera captures can provide an extra level of security for both your home and business.
Anyway, you can enjoy recording your standalone camera or the system cameras on a PC and save a lot of money by avoiding buying new hard drives for your surveillance system.
Related Articles:
Resources:

