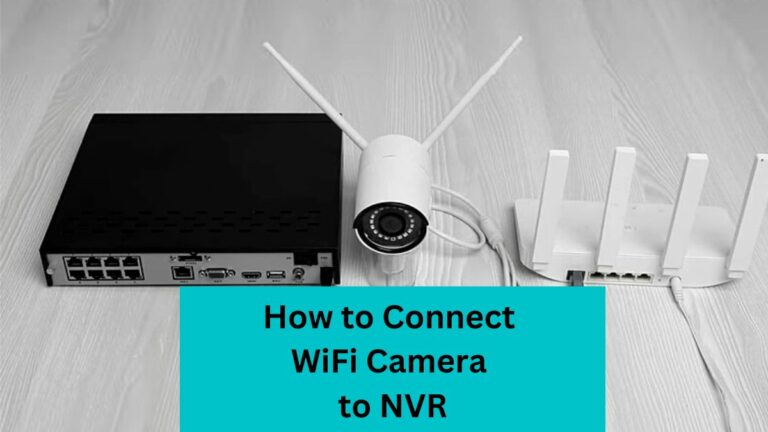
Most homeowners especially beginners don’t know how to connect WiFi camera to NVR.
They pick their surveillance system and after a while, they figure out that the system camera is not pre-installed to the NVR unit and they must be connected to make the system work normally.
In a case like that, they should link WiFi camera to NVR through a home router so they can configure the camera and connect it to the video recorder directly.
On the other hand, if the NVR is wireless, they must hook up the NVR to a monitor, and from the WiFi camera setting page, link the camera to WiFi signal of the video recorder.
In the below words, we dive into how to connect WiFi camera to NVR whether PoE or wireless NVR. Keep reading!
Can I connect any IP camera to my NVR?
Unfortunately, No it’s not allowed to connect any IP camera to NVR unless they are completely compatible with each other. The reason behind that is each IP camera has a different user interface, mobile app, and viewing software. The same also for NVR it has an easy-to-navigate user interface with more options than the IP camera for controlling.
However, in case the IP camera and video recorder are from the same brand, then you can connect them easily. Also, if the IP camera and NVR are from different brands and are compatible with each other, then you can use both of them with a 3rd party viewing software or mobile application.
Can I connect the WiFi camera to PoE NVR?
The answer is YES, you can connect a WiFi camera to a PoE NVR via both wired and wireless connections. For wired, you’ll link the WiFi camera to the home router’s wifi signal, and then connect the PoE NVR to the router with an ethernet cable.
On the other hand, if you want to connect the WiFi camera to PoE NVR, you should link the IP camera to the WiFi signal or router, then install a WiFi adapter for the PoE NVR for converting the wired signal of NVR to wireless.
Next,
Method 1: Connect WiFi camera to PoE NVR
Generally, there are two types of NVRs, the first is wired PoE NVR and it’s connected to PoE cameras or other network devices with an Ethernet cable.
The second type is a wireless NVR, and it’s linked with wifi signals of the IP cameras, and the home routers by using built-in antennas.
Concerning IP cameras there is also a wired PoE and wireless camera. Here in this method, we dive into how to connect a WiFi IP camera to a wired PoE NVR.
Step 1: Make the Major Connections
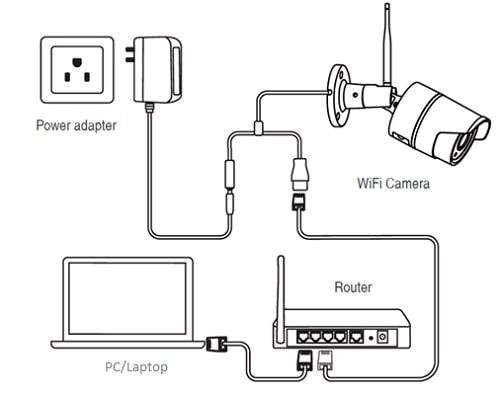
IP security cameras have standard wires for the essential connections according to the camera brand. For example, wifi camera comes with a pigtail that has
- LAN port for ethernet cable if it supports PoE cam.
- Both an ethernet port and a power female connector.
- Power female only if it supports WiFi cam.
This depends on the security camera brand you have. Some WiFi IP cameras are powered by a power adapter, while others are powered by rechargeable batteries linked to solar panels for continuous charging.
Anyway, make the power connection for your IP surveillance camera whether by power adapter, or batteries.
Another thing is, old PoE IP cameras come with a NIC (network interface card) or an Ethernet card.
This card is used to enable the camera owners to use a wired or wireless connection to link the camera with other devices.
In a few cases, you should change the NIC of the camera from the wire(default) option to wireless.
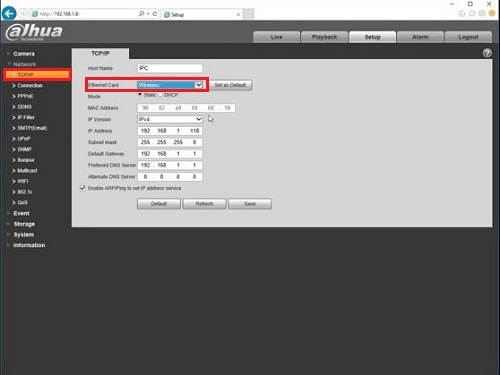
To do this, you have to connect the IP PoE camera to the home router via an ethernet cable so you can access the camera IP from the mobile, or web browser and change the network settings.
Simply, Take an Ethernet cable and attach it to the LAN port of the cam, and the other end to the home network router.
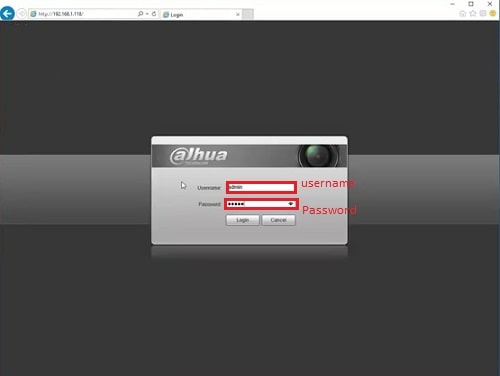
Afterward, turn on the camera, wait a few seconds to get the IP, open any IP config tool to know the correct camera IP, then write the camera IP in a web browser of a PC connected to the same network.
Once the camera page is open, enter the username, and password then hit enter. From the network setting change the card from Wire>to> Wireless. After saving the changes, consider rebooting your video recorder.
Keep in mind that, if your camera supports the WiFi option, the ethernet cable used to connect the camera to the Wi-Fi router is only for setup; it’s not a permanent connection.
In contrast, if your camera is a PoE cam, then the network ethernet cable will be a permanent link between the cam, and the router.
Step 2: Link the NVR to the Home Router
By analogy, we’ll make the same connection but this time for NVR. The network video recorder that the wifi camera will connect to it should be in the same network.
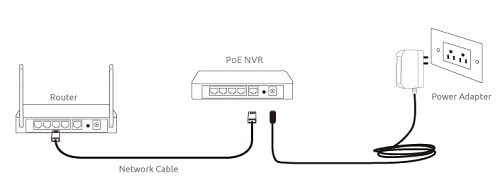
The reason for that is connecting network devices on the same LAN makes the process of accessing the devices on this network easier than you think.
Power on the NVR, bring another network cat5, or cat6 cable, then attach the 1st rj45 connector to the LAN port of the NVR, and the 2nd connector to the second LAN port of the home router.
At this point, you make the essential hardware connections for your security system. The last thing that you should do is check the connection between the devices.
Every network device has a single LED that is specified to show the connection status of the device, so check it and ensure your system is linked successfully.
Step 3: Setup The IP Camera
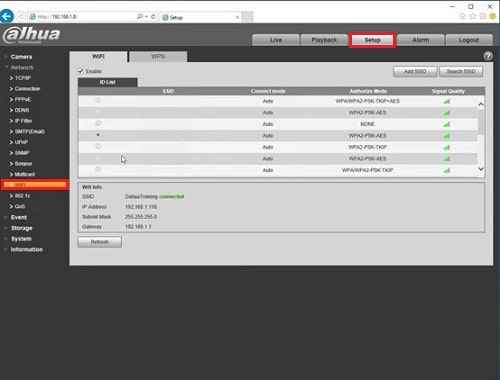
Setting up the wifi IP camera is another important step that you should take care of. In this step, you need to link the camera to the wifi signal.
At the first glance, you may think that it’s hard to do but actually, with some simple setup it’ll be the easiest part for connecting the WiFi camera to the NVR process.
Anyhow, download the IP camera mobile app from the manufacturer’s site, or by using the barcode provided in the camera package to connect your wireless IP security camera to WiFi.
After doing this, Follow the below steps to connect WiFi to NVR through the mobile app:
- Download WiFi IP camera app on your smartphone.
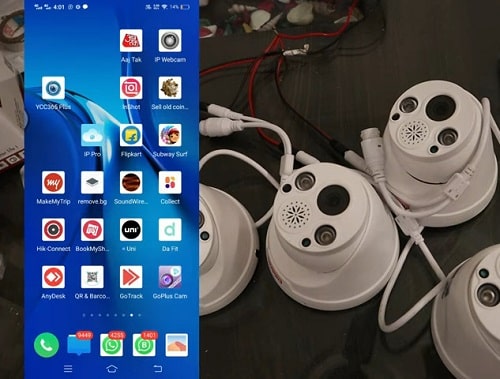
- Launch the camera app on your smartphone.
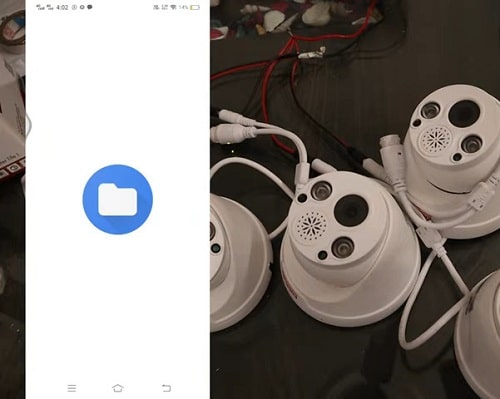
- Click (+) or (ADD) to link the WiFi cam.
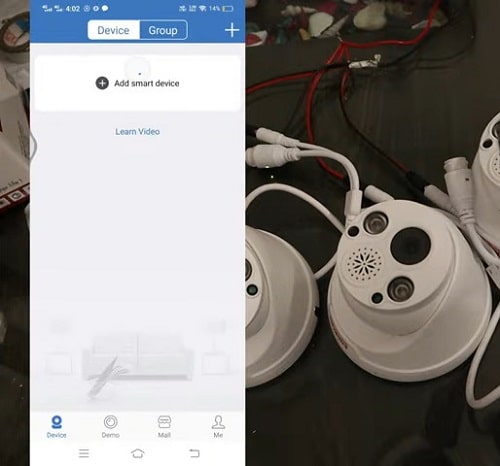
- Select your device model from the app’s main page.
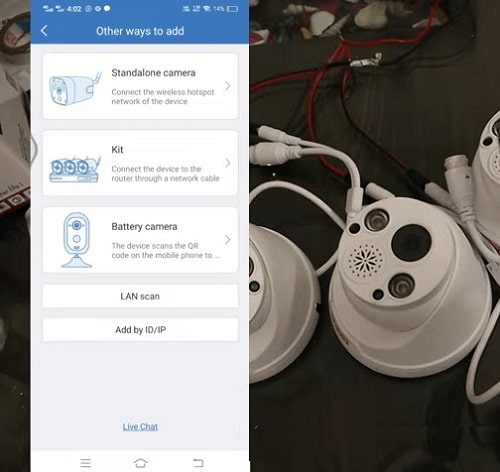
- Scan the QR code of your IP WiFi camera (exists on the camera label).
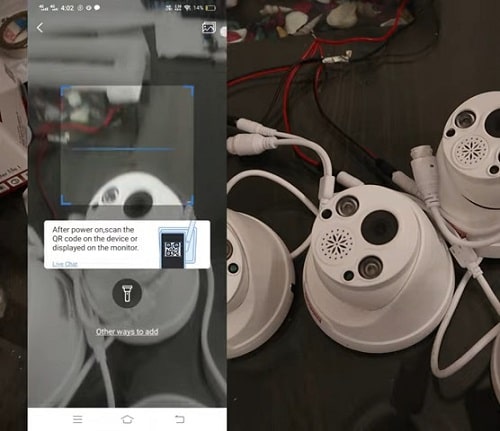
- Open Mobile WiFi settings.
- Choose the IP camera WiFi signal.
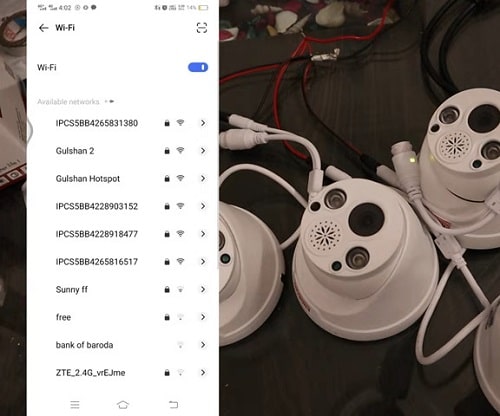
- Enter the camera password.
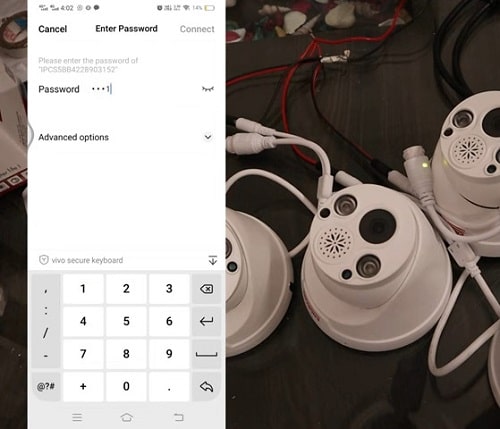
- The app will require you to enter the main network that the camera will be connected to it.
- Enter the SSID (username and password) then click on “Confirm” or “Apply”.
- Again, open the mobile WiFi setting page again, and choose your home router WiFi signal.
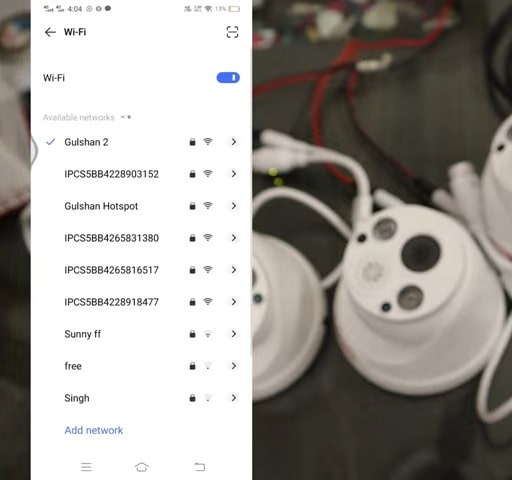
- To complete the network configuration, give a name for the camera, and assign a password for security purposes.
This is the common way of linking the wifi camera to the home router WiFi signal by using the mobile app.
Aside from the mobile app, you can do this from a PC, or laptop by entering the camera IP on the web browser to set it up.
Pro Tip: if the WiFi camera is connected to a different wifi signal consider disconnecting the IP camera from it, and linking the camera to the same router of NVR.
Also, in a few cases, you’ll skip the above steps. What I mean is sometimes the IP cameras are added to the mobile app automatically if they and the mobile phone are connected to the same network.
Step 4: Connect a WiFi Camera to the PoE NVR
Unfortunately, this step may require an additional device for the system and simple software.
Concerning software, you need to download one of the available tools to know the IPs of devices connected to your routers such as ConfigTool from Dahua, or any other software that do the same function.
For accessing and managing the NVR it should be connected to a display screen via HDMI or VGA cable.
The TV or the monitor will allow you to view the camera feeds, and configure the NVR.
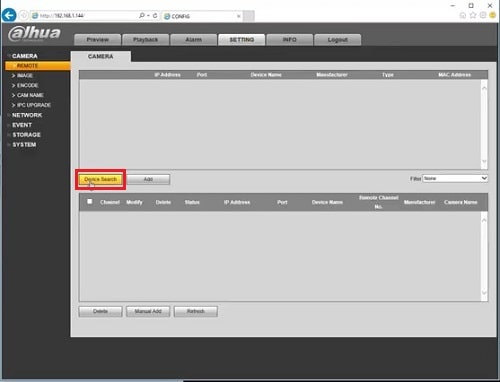
Once you make the connections, go to your NVR setting page, and on setting look at the connected devices.
After that, refresh the page to see the available devices, and if the wifi camera is turned on then you’ll find its Internet protocol(IP) on the config tool.
Wait for a few seconds, and ensure the IP of the camera is the same on both the tool and screen.
Thereafter press on it with the mouse, click on the “ADD” button, enter the login information (username & password), then give it some time and check the connection status and it must be “connected”.
Before you close the network page of the NVR, ensure that the WiFi camera and the NVR have the same subnet mask, and IPs from the same range to avoid networking problems.
Now, your WiFi camera is hooked to the NVR and it’s ready to display the feed on the screen.
Also, You can remove the ethernet cable without fearing the camera being disconnected from your router.
Step 4: Verifying Connection between Wireless Camera and PoE NVR
Once your PoE NVR and WiFi camera have been connected and configured, it’s important to verify that the connection is successful.
To do this, open the main page of your NVR and it’s supposed that the WiFi camera feed appears on the screen.
For more, you can go to “Channel Settings” and then select the “IP channel” option. Here you should see your camera listed and the status should show as “Connected”.
If the status is “Disconnected”, go back and check your network settings to make sure everything is correct. Also, make sure that the camera is powered on.
Once you have verified that the connection is successful, your PoE NVR will begin to receive video from your WiFi camera.
Watch the following video to learn how to connect WiFi camera to NVR, particularly the PoE version.
Source: Reolink
How to Connect WiFi camera to Wireless NVR? or How do I add a wireless IP camera to NVR?
One of the simplest ways to connect WiFi camera to NVR is by using the wifi signal of the video recorder.
As we mentioned above NVR has two types wired, and wireless. The wireless model has no PoE ports and is connected with other wireless devices by using built-in antennas that broadcast/receive wifi signals.
This way is super easy and suitable for people who prefer wireless systems over wired ones.
Now, let’s see the steps:
Step 1. Power the WiFi Camera
As we did in the previous step, you should make the essential connections for your WiFi camera and NVR.
Wireless surveillance cameras are always powered by a 12v DC power adapter, unlike the NVR.
Video recorders consume more power than cameras, they are powered by a 48v DC power adapter.
For connection purposes, take the power adapter of each device and plug in both the WiFi camera and the NVR.
Within a few minutes, the wireless camera will be turned on, and for NVR click on the power button that exists in the back of the video recorder.
Step 2. Configure the Camera Network settings
After completing installing your wireless camera, you should link it to a video recorder to make it record and store video footage on the NVR.
But before you do this, you need to configure the camera and adjust its network settings.
So take the wireless camera and connect it directly by using an Ethernet cable to a PC or laptop to set it up.
Once your wifi camera is powered on and connected to the computer, find the wireless camera IP by using SADP or Config tool.
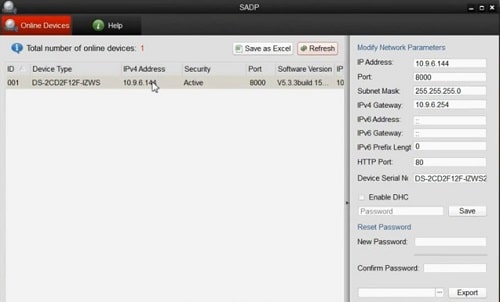
After that, open a web browser, enter the camera IP, then write the camera username and password.
Alternatively, you can repeat the 3rd step in the first way to set up and configure the WiFi camera.
Step 3. Link the IP camera for the NVR wifi signal
As your network video recorder is turned on, the wifi signal of it will appear beside the other WiFi signals in your range.
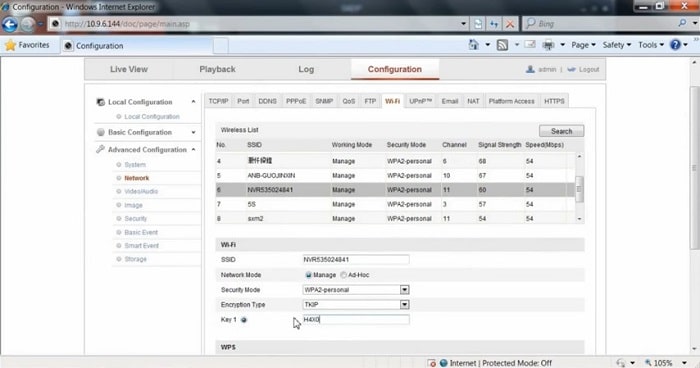
Unfortunately, not all WiFi cameras activate the WiFi option and they rely on ethernet cables for the connection with other network devices so you have to check and see if it’s enabled or not.
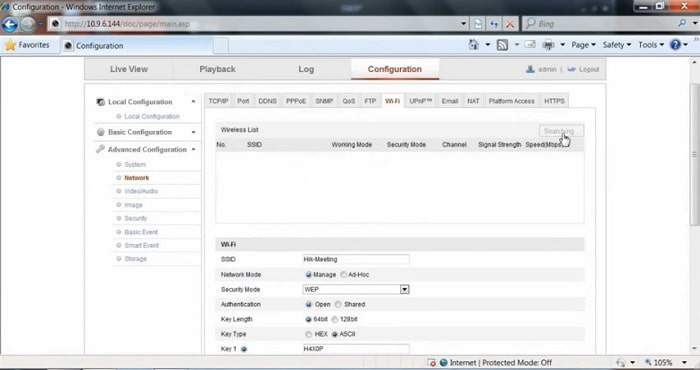
To do this on your camera, simply you should change the NIC or Ethernet card from LAN to WLAN first, after that enable the WiFi option for the IP camera.
Go to “Configuration”> select “Network”> click on “Advanced settings”> then change the NIC.
Once the NIC is changed this means that the WiFi option is enabled for the wireless camera and it’s ready to hook it up to the NVR.
On the same setting page of the WiFi camera, open the configuration page of the IP camera again, go to the” WiFi” section and click on the “Refresh” button.
Within a minute, the wifi signal of the NVR will appear on the monitor, click on it and enter the WiFi signal password.
Step 4. Watch the wifi camera feed on NVR
The tricky step is being finished and now it’s time for a simple one. In this step, you need to just check the connection and watch the camera feed on NVR.
If you’re using a PC, write the NVR IP on the web browser, and enter the login info, in the live view page it’s supposed that the linked cameras feed appears.
In case there’s nothing appears, check the wired connections for power especially, then troubleshoot the WiFi signal to see if it’s weak or the password is changed by someone else.
Note that you can skip one or more of the mentioned steps above to connect WiFi camera to NVR if your network video recorder has an “Auto add” or “Auto Link” feature.
This advantage has been used with most security camera brands to make the WiFi cameras and the video recorder from the same manufacturer be connected automatically without any additional setup or configuration.
Helpful Link: Best Selling NVRs for Home Use.
Can NVR connect to WiFi wirelessly?
Generally, YES NVR can be connected to WiFi wirelessly or through a wired connection. For connecting NVR to WiFi wirelessly, you can pick an NVR with a built-in antenna, or if you have a PoE NVR purchase a wifi adapter for it.
But to connect NVR to WiFi through wires, pick an Ethernet cable and attach it from the router to the LAN port of the video recorder.
Before you go…
Linking a WiFi camera to NVR has many benefits whether it’s an online or offline connection.
Firstly, since the NVR is connected to a router so it has access to the internet which allows you to view the captured footage remotely, no matter where you are, or what device you’re using.
Secondly, an NVR provides more features than just recording videos, such as compressing and meaning cameras.
Furthermore, some IP cameras have the ability to store recordings via SD cards and if they are not connected to the NVR the footage of the cameras can’t be accessed.
Related Articles:
